The transition from traditional freehand implant placement to prosthetically driven, digitally planned surgery is no longer a futuristic concept—it is the baseline for predictable clinical outcomes. Freehand placement relies heavily on operator experience, introducing variables in angulation, depth, and anatomical proximity that can compromise both patient safety and the final restorative phase. Adopting a Digital Surgical Guide bridges the gap between virtual treatment planning and physical execution, ensuring that the implant is placed exactly where the final prosthesis demands. This guide evaluates the technical requirements, workflow integration, and economic trade-offs of implementing guided surgery. We will look at the exact clinical steps required to move from a basic freehand approach to a fully integrated digital workflow. You will see how specific tools and software align to create a predictable surgical environment. The goal is to eliminate guesswork and rely on hard data for every osteotomy.
Prosthetically Driven Precision: Digital surgical guides translate 3D virtual planning (merging CBCT and intraoral scans) into physical templates, restricting drill trajectory and depth to sub-millimeter tolerances.
Workflow Interdependence: Successful guided surgery relies on a strict digital ecosystem, requiring accurate data acquisition, precise software alignment, and the correct utilization of components like a scan body for restorative continuity.
The Interdisciplinary Blueprint: The guide serves as a physical synthesis of the clinical plan, facilitating seamless communication and alignment between the restorative dentist, surgical specialist, and laboratory technician.
In-House vs. Outsourced Fabrication: Practices must weigh the capital expenditure and learning curve of in-house 3D printing against the recurring costs and turnaround times of lab-fabricated guides.
Risk Mitigation: While guides significantly reduce anatomical risks, clinicians must actively manage new variables such as guide seating verification, thermal control during drilling, and software merging inaccuracies.
Table of Contents
Toggle
Defining the Digital Surgical Guide in Modern Implantology
Anatomy of the Guide
A surgical guide consists of a biocompatible acrylic or photopolymer resin base designed to fit intimately over the patient's existing dentition, mucosa, or bone. You will find inspection windows strategically placed along the occlusal or buccal aspects. These windows allow clinicians to verify complete seating visually before any drilling begins. Metallic drill sleeves are embedded within the resin. These sleeves dictate the precise angulation and depth of the surgical drills. The friction fit between the drill key and the metal sleeve prevents the bur from wandering off the planned axis. Manufacturers use different sleeve diameters depending on the specific implant system. You must match the guide sleeve to the exact surgical kit you plan to use. Using mismatched components leads to immediate trajectory errors. The resin base itself must be rigid enough to resist deformation under the lateral forces applied during the osteotomy.
The Physical "Roadmap" Metaphor
Think of the guide as a physical roadmap that constrains the surgical drills to a pre-planned path. This eliminates intraoperative guesswork entirely. By locking the drill into a specific trajectory, the guide ensures the osteotomy aligns perfectly with the virtual plan. You no longer have to eyeball the angulation relative to adjacent teeth. The guide forces your hand into the correct position. If the patient moves slightly, the guide moves with them, maintaining the relative trajectory. This physical constraint is what separates guided surgery from freehand navigation. You are relying on the physical boundaries of the metal sleeve rather than your visual spatial awareness. This mechanical restriction is the primary mechanism for reducing human error during the drilling sequence.
The Shift to Prosthetically Driven Planning
Modern implantology has pivoted from placing the implant where the bone is most abundant to planning the ideal restorative outcome first. Clinicians now engineer the surgical site to support the planned prosthesis. You start by designing the final crown in the software. Then you position the implant virtually to support that specific crown design. If the ideal implant position lacks sufficient bone, you plan for a grafting procedure rather than compromising the implant position. This prosthetically driven approach ensures optimal aesthetics and biomechanical function. It prevents situations where an implant is perfectly integrated into bone but impossible to restore properly. You avoid off-axis loading and poor emergence profiles by letting the final restoration dictate the surgical starting point.
Pilot vs. Fully Guided Systems
Pilot guides only dictate the trajectory and depth of the initial osteotomy. They leave subsequent drilling steps to the surgeon's discretion. You use the pilot guide to establish the initial depth and angle, then remove it to finish the site freehand. Fully guided systems control every drill sequence, including the final implant insertion. You use a series of drill keys that step up in diameter, all fitting into the same master sleeve. This maximizes precision throughout the entire procedure. Fully guided systems require a specific surgical kit designed for guided surgery. These kits have longer drills to compensate for the height of the guide sleeve. You must account for this extra length when evaluating patient mouth opening.
Freehand vs. Guided Surgery: Establishing Success Criteria
Precision and Angulation Tolerances
Freehand placement often results in higher statistical deviations regarding apical position and angular discrepancies compared to guided placement. Guided surgery restricts these deviations to sub-millimeter tolerances. You can expect an average deviation of less than 1mm at the entry point and less than 1.5mm at the apex with a well-fitting guide. Freehand surgery often exceeds 2mm of deviation at the apex, especially in inexperienced hands. Angular deviations in freehand surgery can easily exceed 5 degrees. Guided surgery typically keeps angular deviation below 3 degrees. This level of accuracy is difficult to achieve consistently by hand, regardless of operator experience. The physical constraint of the guide sleeve removes the natural tremor and visual miscalculations inherent in human hands.
Anatomical Risk Mitigation
Digital guides provide hard stops and fixed trajectories to avoid critical structures. This significantly reduces the risk of damaging the inferior alveolar nerve, mental foramen, and maxillary sinus during the osteotomy. You plan a safety zone of 2mm around the nerve in the software. The guide physically prevents the drill from breaching that safety zone. The drill flange hits the top of the metal sleeve, stopping vertical progression instantly. This mechanical stop is far more reliable than watching depth markings on a spinning bur covered in blood and saliva. You can operate with higher confidence in posterior mandibular regions where the nerve path is complex. The guide acts as an insurance policy against catastrophic anatomical damage.
Predictable Aesthetic and Restorative Outcomes
Pre-planning the implant position dictates optimal emergence profiles, crown-to-implant ratios, and soft-tissue aesthetics. This ensures the final restoration is indistinguishable from natural dentition and functions harmoniously within the oral cavity. You can plan the exact depth of the implant platform relative to the planned gingival margin. This prevents the metal collar from showing through thin tissue. You also ensure the screw access hole exits through the cingulum of anterior teeth or the central fossa of posterior teeth. This allows for screw-retained restorations, which are generally preferred over cement-retained options. The guide ensures the physical implant matches this virtual plan perfectly.
Impact on Immediate Loading Protocols
The predictability of guided placement facilitates the accurate pre-fabrication of provisional restorations. This allows clinicians to execute immediate loading scenarios with confidence. You know the implant will emerge exactly where planned, so the pre-milled temporary crown will fit with minimal adjustments. You can have the lab mill the provisional before the surgery even takes place. Once the implant is placed through the guide, you attach the temporary cylinder and pick up the pre-milled crown. This drastically reduces chair time during complex immediate load cases. It also provides the patient with an immediate aesthetic result without waiting for a lab turnaround after the surgery.
Clinical Metric
Freehand Surgery
Guided Surgery
Apical Deviation
Often exceeds 2.0mm
Consistently under 1.5mm
Angular Deviation
Variable, often > 5 degrees
Restricted to < 3 degrees
Depth Control
Visual reliance on bur markings
Mechanical hard stops on sleeves
Provisionalization
Requires intraoperative fabrication
Allows pre-fabrication of temporaries
Surgical Time
Longer intraoperative decision making
Shorter, execution-focused workflow
Types of Digital Surgical Guides and Clinical Applications
Tooth-Supported Guides
Tooth-supported guides are ideal for single-tooth or partial edentulism cases. They offer high accuracy and stability because they rest directly on the adjacent natural dentition. The hard tissue of the teeth provides a rigid foundation that does not compress under pressure. You design the guide to snap over the undercuts of the adjacent teeth. This provides excellent retention during the drilling sequence. You must ensure the intraoral scan captures the occlusal anatomy perfectly to guarantee a good fit. Any distortion in the scan will translate to a rocking guide. You should always verify the fit on a printed model before the patient arrives. Tooth-supported guides are the most common and most accurate type of surgical guide used in daily practice.
Mucosa-Supported Guides
These guides are applied in fully edentulous arches. They require dual-scan protocols and the use of anchor pins for stabilization. Clinicians must carefully manage the challenges of tissue resiliency to ensure accurate seating and drilling. The soft tissue compresses under pressure, which can alter the trajectory of the guide. You must use a rigid bite registration to seat the guide in the correct position before placing the anchor pins. The anchor pins lock the guide into the buccal bone, preventing movement during the osteotomy. You typically need three to four anchor pins distributed across the arch for maximum stability. The dual-scan protocol involves scanning the patient's existing denture with radiographic markers, then scanning the patient wearing the denture. This aligns the soft tissue profile with the underlying bone.
Bone-Supported Guides
Bone-supported guides are utilized in cases requiring significant bone reduction or complex anatomical grafting. They necessitate larger flap reflections to seat directly on the osseous crest. You use these guides when the soft tissue is too thick or mobile to provide a stable base. The guide rests directly on the bone, providing absolute stability during extensive surgical interventions. You must reflect a full-thickness mucoperiosteal flap to expose the bone completely. Any remaining soft tissue tags will prevent the guide from seating properly. These guides are often used in full-arch immediate load cases where you need to reduce the bone level to create restorative space. The guide itself can incorporate a bone reduction template to guide the saw or bur during the leveling process.
The Digital Workflow: From Data Acquisition to Execution
CBCT and Intraoral Scanning Integration
Accurate virtual planning requires acquiring high-resolution DICOM data to visualize bone and anatomy. You take a CBCT scan to capture the exact volume and density of the available bone. You must ensure the patient is completely still during the scan to prevent motion artifacts. This DICOM data is combined with STL/PLY data from intraoral scans. The intraoral scan captures the surface topography and dentition with high precision. You scan the arches and the bite registration. The intraoral scanner provides a much sharper image of the teeth than the CBCT. You need both datasets to plan the case properly. The CBCT shows you where the bone is, and the intraoral scan shows you where the teeth and soft tissue are.
Interdisciplinary Collaboration and File Sharing
Digital workflows enable real-time collaboration and cloud-based file sharing. The surgical specialist, restorative dentist, and lab technician can review and approve the plan before fabrication begins. You upload the merged datasets to a cloud platform. The restorative dentist designs the ideal crown position. The surgeon then places the virtual implant to support that crown while avoiding anatomical hazards. The lab technician verifies that the planned position allows for proper material thickness and emergence profile. Everyone signs off on the plan digitally. This eliminates miscommunication and ensures all parties are working toward the exact same goal. It prevents the common scenario where the surgeon places an implant that the restorative dentist cannot restore.
Dataset Merging and Software Planning
Aligning the two datasets in implant planning software is a critical technical process. You import the DICOM and STL files into the planning software. You then identify common landmarks on both datasets, such as the cusp tips of remaining teeth. The software uses these landmarks to stitch the two files together. You must verify the accuracy of this merge by checking the cross-sectional slices. The outline of the STL teeth should perfectly match the radiopaque outline of the teeth in the DICOM data. If the merge is inaccurate, the surgical guide will not fit the patient's mouth. You must focus on scatter reduction during the CBCT scan. Metal restorations create scatter that obscures the tooth anatomy, making the merging process difficult. You may need to use a radiopaque bite registration to separate the arches and improve visibility.
The Role of the Scan Body in the Digital Ecosystem
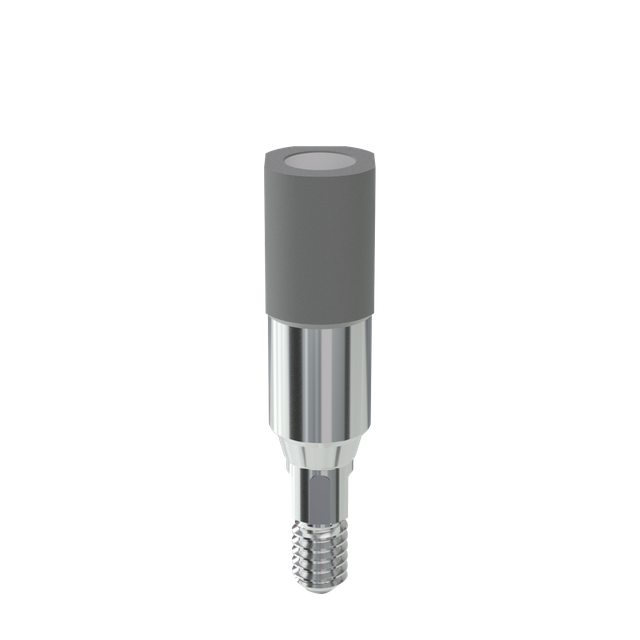
The Scan Body functions post-placement or during immediate loading phases to accurately transfer the 3D position and angulation of the implant to the CAD software. You screw the scan body into the implant fixture. You then use an intraoral scanner to capture the geometry of the scan body relative to the adjacent teeth. The CAD software recognizes the specific shape of the scan body and calculates the exact position of the implant platform. This ensures the restorative phase is executed with the same precision as the surgical phase. You do not need to take messy physical impressions. The digital impression is faster, cleaner, and more accurate. The scan body is the critical link between the physical implant in the bone and the virtual model used to design the final crown.
Acquire high-resolution CBCT scan (DICOM format).
Perform intraoral scan of arches and bite (STL/PLY format).
Import both datasets into implant planning software.
Align datasets using common dental landmarks.
Design virtual restoration based on ideal occlusion.
Position virtual implant to support the planned restoration.
Design surgical guide around the planned implant trajectory.
Export guide design for 3D printing.
Evaluating In-House 3D Printing vs. Lab-Fabricated Guides
Capital Equipment and Infrastructure
In-house production requires initial investments in clinical 3D printers, FDA-approved biocompatible resins, and automated wash/cure stations. You need a printer capable of high-resolution output to ensure the drill sleeves fit perfectly. You also need a dedicated space for the printing equipment, as the resins can be messy and emit odors. Practices must assess if their implant volume justifies this capital expenditure. If you only place a few implants a month, outsourcing to a lab is more cost-effective. If you place multiple implants a week, the printer will pay for itself quickly. You also need to factor in the cost of the planning software licenses and the ongoing cost of resin and printer maintenance.
Turnaround Time and Clinical Flexibility
In-house printing allows for same-day guide fabrication. This is highly beneficial for emergency cases or patients traveling from out of town. You can scan the patient in the morning, plan the case over lunch, and print the guide for an afternoon surgery. External dental laboratories typically require a 3-to-5-day turnaround. This requires a second appointment for the surgery, which delays treatment and increases the risk of the patient changing their mind. In-house printing gives you complete control over the timeline. If a guide breaks or doesn't fit, you can adjust the design and reprint it immediately. You are not at the mercy of shipping delays or lab backlogs.
Quality Control and Compliance
In-house printing introduces regulatory and quality assurance burdens. You are acting as a manufacturer when you print a surgical guide. Practices must manage printer calibration, resin handling, and strict post-processing protocols. You must wash the printed guide in isopropyl alcohol for a specific amount of time to remove uncured resin. You then cure the guide in a UV light chamber to achieve final biocompatibility and strength. If you skip these steps, the guide may be toxic to the patient's tissue or too weak to withstand the drilling forces. You must document your maintenance and calibration procedures to ensure consistent dimensional stability. Outsourcing to a lab shifts this liability and quality control burden to a dedicated facility.
Implementation Risks and Mitigation Strategies
Managing Seating Inaccuracies
Poor guide seating can result from intraoral scan distortion, unremoved calculus, or tight interproximal contacts. If the guide does not seat completely, the drill trajectory will be altered, leading to inaccurate implant placement. Clinicians must verify fit using inspection windows before initiating the drilling sequence. You should look through the windows to ensure the resin is resting flush against the occlusal surfaces of the teeth. If there is a gap, the guide is not seated. You may need to adjust the internal surface of the guide or remove calculus from the patient's teeth. Always check the fit on a printed model before the surgery. If it doesn't fit the model, it won't fit the patient.
Thermal Damage and Irrigation Challenges
Restricted coolant access through the guide sleeves increases the risk of bone necrosis. The metal sleeve blocks the external irrigation from reaching the cutting edge of the bur. Overheating the bone leads to implant failure. Mitigation techniques include utilizing pumping drill motions. You drill down a few millimeters, pull the bur out to let coolant in, and then drill deeper. You should also employ internally irrigated drills if your system supports them. These drills deliver coolant directly to the tip of the bur through a hollow channel. Always use chilled saline for irrigation during guided surgery. Keep your drill speeds within the manufacturer's recommended limits to minimize heat generation.
Patient Presentation and Case Selection Barriers
Restricted mouth opening in posterior regions may physically prevent the use of long guided drills and sleeves. Guided surgery requires more vertical clearance than freehand surgery because the drill must pass through the guide sleeve before entering the bone. Clinicians must evaluate patient anatomy during the planning phase. You can measure the patient's maximum opening and compare it to the length of the guided drill assembly. If the patient cannot open wide enough, you cannot use a fully guided system in the posterior. You may have to use a pilot guide or revert to freehand placement. Do not force the drill into the sleeve if the patient cannot open adequately, as this will alter the trajectory and damage the handpiece.
Overcoming the Learning Curve
Guided surgery does not replace surgical skill. It is a tool that enhances precision, but it requires a solid understanding of surgical principles. Clinicians must maintain the ability to abort the guided protocol and revert to freehand techniques if intraoperative deviations occur. If the guide fractures or fails to seat properly, you must know how to finish the case without it. You must also be able to recognize when the virtual plan is flawed. If the bone density feels different than expected, you must adjust your drilling protocol accordingly. Start with simple single-tooth cases to build confidence with the workflow before attempting complex full-arch rehabilitations. The learning curve involves mastering the software and the physical handling of the guide components.
Conclusion
Digital surgical guides are an indispensable tool for achieving prosthetically driven outcomes, reducing surgical morbidity, and increasing restorative predictability. They remove the guesswork from implant placement and replace it with data-driven execution. Companies like KETAI play a pivotal role in this ecosystem, functioning as a leading digital dentistry partner that provides clinicians with the high-precision digital tools, advanced manufacturing capabilities, and integrated workflows necessary to streamline this transition. Ultimately, the digital surgical guide represents the ultimate integration of restorative requirements, surgical safety, and dental laboratory precision. By adopting this technology, you elevate the standard of care provided to your patients.
FAQ
Q: What is the average deviation in guided implant surgery?
A: Guided surgery typically achieves sub-millimeter deviations at both the entry point and the apex. This contrasts sharply with freehand placement, which often exhibits greater angular and positional discrepancies depending on operator experience.
Q: Can a digital surgical guide be used for all implant cases?
A: No. Limitations exist, such as restricted mouth opening in posterior regions. This can physically prevent the insertion of the long guided drills and sleeves required for the procedure.
Q: How do scan bodies function within the guided surgery workflow?
A: They digitize the final implant position, transferring precise 3D location and angulation data to the CAD/CAM software for designing the final or provisional prosthesis.
Q: What materials are used to 3D print surgical guides?
A: Surgical guides are typically 3D printed using Class I or Class IIa biocompatible, autoclavable photopolymer resins to ensure safety and dimensional stability during surgery.
Q: What is the difference between a pilot guide and a fully guided system?
A: Pilot guides only direct the trajectory of the first drill. Fully guided systems control the entire osteotomy sequence and the final delivery of the implant.
Q: How long does it take to design and print a digital surgical guide in-house?
A: Software planning takes 20-30 minutes. Printing requires 45-90 minutes, followed by roughly 30 minutes for washing, curing, and inserting the metal sleeves.
Q: How does a digital surgical guide improve aesthetic outcomes?
A: By pre-determining the exact depth and angulation relative to the planned restoration, guides prevent aesthetic complications like mucosal recession, metal exposure, or poor tooth emergence profiles.