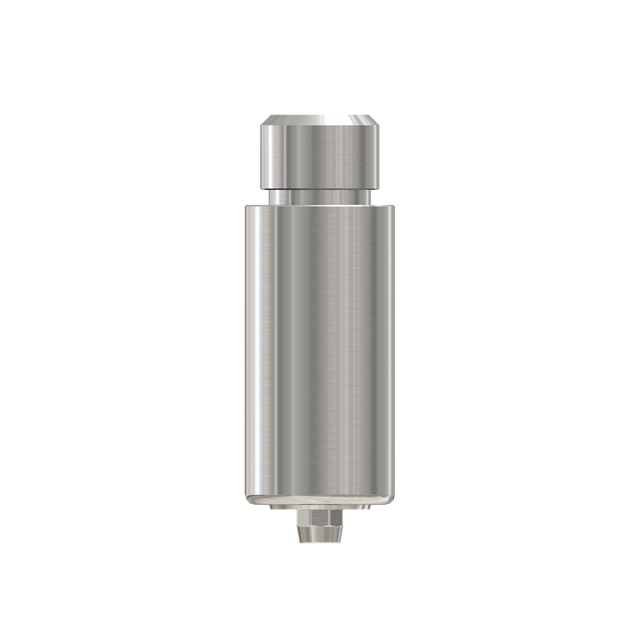
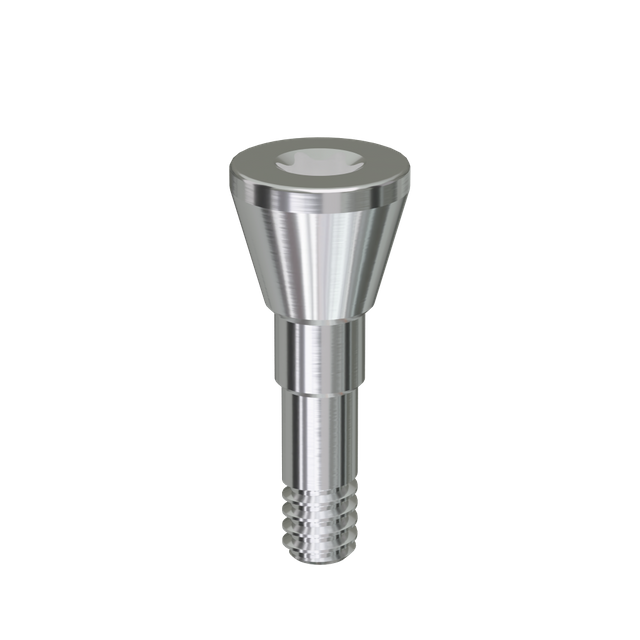
Precise peri-implant soft tissue management dictates the long-term aesthetic and functional success of dental implants. Inadequate emergence profiles cause aesthetic failure in the anterior zone, food impaction, and increased susceptibility to peri-implantitis due to poor mucosal seals. A Healing Abutment—often called a healing cap, healing collar, or gingival former—solves this core clinical problem. It is not a temporary placeholder. It serves as a critical architectural tool that dictates the transition from a surgical fixture to the final restoration. By guiding the gingival tissue during the healing phase, it establishes the foundation for a natural, healthy, and easily maintainable implant restoration. You will learn how to select materials, choose between standard and custom designs, and implement precise surgical protocols to optimize soft tissue contours.
Key Takeaways
Architectural Foundation: A healing abutment guides the healing of the peri-implant mucosa, establishing the emergence profile necessary for a natural-looking final crown.
Standard vs. Custom: While standard cylindrical abutments suffice for posterior restorations, customized (anatomical) healing abutments are critical for maintaining keratinized mucosa volume and the natural mucogingival line, especially in the aesthetic zone.
Material Impact: Material selection (Titanium, PEEK, Zirconia) directly influences soft tissue adhesion, plaque accumulation, and overall biocompatibility during the osseointegration phase.
Workflow Integration: Modern digital workflows, intraoral scanning, and chairside fabrication systems allow for precise, patient-specific soft tissue contouring, reducing the need for secondary soft tissue grafting.
Table of Contents
Toggle
The Clinical Function of a Healing Abutment
Soft Tissue Contouring and Emergence Profile
The primary biological mechanism of this component involves guiding gingival tissue to form a natural, stable sulcus. During the initial healing phase, the mucosal tissues adapt to the shape of the transmucosal component. This adaptation transitions the circular implant platform into the anatomical cross-section required for the final restoration. Proper contouring ensures the final crown emerges from the gums exactly like a natural tooth. Without this guided healing, the tissue collapses over the implant platform, complicating the restorative phase and compromising aesthetics. Clinicians must evaluate the three-dimensional spatial relationship between the implant platform and the proposed gingival margin. The transmucosal component must provide adequate running room to allow a gradual transition from the narrow implant connection to the wider cervical portion of the planned crown. A steep emergence angle often leads to tissue recession, while a shallow angle can cause plaque retention and chronic inflammation.
Protection of the Implant Fixture and Biological Seal
Beyond shaping tissue, the component acts as a temporary crown substitute. It seals the internal implant connection from the harsh oral environment, keeping out oral fluids and food debris. A secure, tight seal prevents epithelial downgrowth into the implant well. It also stops bacterial colonization that can trigger crestal bone resorption. Maintaining this biological seal is paramount for the long-term survival of the implant fixture. Clinicians must ensure the component seats fully without any micro-gaps. Radiographic verification of complete seating is a mandatory step before dismissing the patient. Any gap at the implant-abutment interface acts as a bacterial reservoir, leading to localized inflammatory responses and early crestal bone loss. The transmucosal component must be torqued to the manufacturer's specific recommendations, usually between 10 and 15 Ncm, to prevent loosening during the healing phase.
Maintaining the Mucogingival Architecture
Preserving the interdental papillae and the mucogingival junction requires careful spatial management. The right transmucosal shape supports the interproximal tissue peaks, preventing the formation of unesthetic black triangles. Success criteria prior to final impressions include achieving adequate soft tissue thickness and a sufficient band of keratinized tissue width. These factors provide a robust barrier against mechanical trauma during brushing and eating. They also mask the grayish hue of titanium fixtures in patients with thin tissue biotypes. To achieve optimal mucogingival architecture, clinicians follow specific evaluation steps:
Assess the initial tissue biotype using a periodontal probe to determine thickness and transparency.
Measure the distance from the bone crest to the proposed contact point to predict papilla fill.
Select a transmucosal component that provides adequate horizontal support without causing ischemia.
Monitor tissue maturation over 4 to 8 weeks, adjusting the component size if necessary to guide papilla formation.
Standard vs. Customized Healing Abutments: A Clinical Evaluation
Standard Healing Collars (Pros, Cons, and Sizing Parameters)
Standard healing collars feature pre-manufactured, cylindrical designs. They are highly scalable, stock-ready, and cost-effective for everyday clinical practice. When selecting a standard collar, clinicians must evaluate the collar height and the emergence diameter. The height should measure from the implant platform to 1-2mm above the gingival margin. However, these stock options have distinct limitations. They fail to mimic the natural tooth root cross-section. This often results in a circular tissue cuff. Restorative dentists then face challenges during final crown delivery, requiring forceful tissue blanching, surgical relief, or extensive tissue modification. Standard collars are best utilized in posterior regions where aesthetic demands are lower and tissue biotypes are generally thicker. They provide a predictable, fast solution for uncovery procedures in the molar and premolar areas.
Anatomical / Customized Healing Abutments
Customized designs replicate the exact cervical and emergence profile of the specific tooth being replaced. They are patient-specific and highly anatomical. In immediate implant applications post-extraction, they are essential. They support the remaining socket walls, prevent soft tissue collapse, and maintain the natural mucogingival line. The clinical value is significant. Custom shaping minimizes chair time during the restorative phase. It eliminates the need for secondary tissue conditioning and drastically reduces the risk of black triangles. By mimicking the extracted tooth's root shape, the custom component maintains the existing gingival architecture, preventing the collapse of the buccal plate and interdental papillae. This approach is particularly beneficial in the anterior maxilla, where even minor tissue alterations can lead to noticeable aesthetic failures.
Evaluation Dimensions: When to Deploy Each System
Choosing between standard and custom systems requires a clear decision framework. Consider the following parameters to determine the most appropriate clinical approach for each specific patient presentation.
Clinical Parameter
Standard Healing Collar
Customized Healing Abutment
Anatomical Location
Posterior regions (molars, second premolars)
Aesthetic zone (incisors, canines, first premolars)
Tissue Biotype
Thick, flat, fibrotic tissue
Thin, highly scalloped tissue
Surgical Protocol
Delayed placement / Routine uncovery
Immediate implant placement post-extraction
Clinical Workflow
Fast, off-the-shelf, analog impressions
Requires CAD/CAM, intraoral scanning, or chairside fabrication
Aesthetic Demand
Low to moderate
High to critical
Material Selection and Biocompatibility Trade-Offs
Machined Titanium
Machined titanium remains the industry standard for transmucosal components. It offers high fracture resistance and excellent biocompatibility. Clinical studies consistently demonstrate proven hemidesmosome attachment, creating a robust mucosal barrier against bacteria. However, there are trade-offs. The gray metallic hue can cause shadowing through thin gingival biotypes, particularly in the anterior region. This shadowing can compromise the final aesthetic outcome if the tissue is not thick enough to mask the metal. Titanium components are highly durable and can be sterilized and reused according to manufacturer guidelines, making them a staple in most surgical setups. When using titanium in the aesthetic zone, clinicians must ensure a minimum soft tissue thickness of 2mm to prevent gray discoloration of the overlying mucosa.
PEEK (Polyether Ether Ketone) and PMMA
PEEK and PMMA offer distinct advantages for interim phases. They are lightweight, tooth-colored, and easily modifiable chairside. This makes them excellent for improving interim aesthetics and customizing emergence profiles on the fly. The primary trade-offs include higher surface roughness compared to highly polished titanium. This roughness increases the potential for plaque accumulation. Therefore, PEEK and PMMA are strictly indicated for short-term provisional phases rather than extended healing periods. Clinicians often use these materials to fabricate custom components immediately after extraction. The ability to add or subtract material chairside using flowable composite or acrylic burs allows for precise adaptation to the extraction socket, supporting the gingival margins during the critical first few weeks of healing.
Zirconia
Zirconia provides superior aesthetics and a very low plaque affinity. The soft tissue response to highly polished zirconia is excellent, making it highly favorable for the anterior maxilla, especially in patients with thin biotypes. The white color eliminates gray shadowing entirely. The trade-offs involve higher manufacturing costs and material properties. Zirconia is brittle under excessive torque and is much less modifiable chairside compared to polymers or titanium. When utilizing zirconia, clinicians must ensure the internal connection is precisely machined to avoid micromovement. Any adjustment to the zirconia surface requires specialized diamond burs and meticulous polishing to restore the smooth surface necessary for optimal soft tissue attachment and plaque resistance.
Placement Protocols: Surgical Timing and Technique
One-Stage Surgery (Immediate Placement)
In a one-stage protocol, the clinician places the transmucosal component simultaneously with the implant fixture. This approach avoids a second uncovery surgery. The primary success criterion is high primary stability. The implant must achieve an insertion torque greater than 35 Ncm. This stability is necessary to withstand micro-movements transferred through the exposed collar, which could otherwise jeopardize osseointegration. Proper patient compliance regarding a soft diet is also critical during this phase. The surgical sequence involves precise steps to ensure success:
Achieve adequate primary stability of the implant fixture during insertion.
Select a transmucosal component that matches the planned emergence profile without applying excessive pressure to the buccal plate.
Hand-tighten the component using a calibrated torque wrench to the specified value.
Suture the soft tissue margins passively around the component to establish a primary seal.
Two-Stage Surgery (Delayed Placement / Uncovery)
A two-stage protocol involves uncovering the implant after 3 to 6 months of submerged osseointegration. Clinicians must choose between tissue punch techniques and crestal incisions. A tissue punch is minimally invasive but removes keratinized tissue. Crestal incisions allow the surgeon to manage flap tension and reposition keratinized tissue around the newly placed component. Preserving this tissue is vital for long-term mucosal health and implant stability. When performing a crestal incision, the surgeon can utilize a split-thickness flap to roll the tissue buccally, increasing the soft tissue volume on the facial aspect. This technique enhances the aesthetic outcome and provides a thicker barrier against future recession.
Soft Tissue Tension and Suturing Techniques
Securing the mucosal margins around the collar requires precise suturing. Techniques like sling sutures or mattress sutures help adapt the tissue closely to the metal or ceramic surface. Clinicians must avoid causing ischemia or necrosis by tying sutures too tightly. Apical displacement of the flap must also be avoided. The goal is a tension-free closure that supports the papillae and encourages a tight biological seal during the early healing weeks. Using monofilament sutures, such as PTFE or nylon, reduces plaque accumulation along the suture line compared to braided materials. Sutures should remain in place for 7 to 14 days, depending on the extent of the soft tissue manipulation and the patient's healing response.
Digital Workflows and Chairside Customization
Intraoral Scanning and CAD/CAM Integration
Modern implantology has shifted from traditional analog impressions to digital scanning. Clinicians can now capture the matured emergence profile using intraoral scanners. By utilizing scan bodies and extensive digital libraries, dental technicians can design custom components pre-operatively or immediately post-surgery. This digital integration ensures high precision, reduces patient discomfort, and streamlines the communication between the surgical clinic and the dental laboratory. The digital workflow allows for the creation of a duplicate custom component that perfectly matches the provisional restoration, ensuring the soft tissue architecture is maintained exactly as developed during the provisional phase.
Chairside Fabrication Systems
Chairside mold systems allow clinicians to generate anatomical composite or PMMA abutments immediately post-extraction or at uncovery. These systems use pre-formed silicone molds that match various root cross-sections. The clinician fills the mold with flowable composite around a temporary titanium cylinder. This process rapidly creates a highly customized shape that perfectly supports the extraction socket or guides the uncovery tissue, all without waiting for a lab. This immediate customization prevents the collapse of the buccal and lingual soft tissues, preserving the natural contours of the extraction site and significantly reducing the complexity of the final restorative phase.
Overall Value Influencing Factors
Implementing digital and custom workflows requires an initial investment in clinical time and financial resources. However, this investment pays off significantly. It drastically reduces restorative complications, minimizes chairside adjustments during final crown delivery, and often eliminates the need for secondary surgical procedures like connective tissue grafts. The predictability of the final aesthetic outcome justifies the upfront effort in the vast majority of aesthetic zone cases. By controlling the emergence profile from the day of surgery, clinicians reduce the total number of patient visits and increase the overall success rate of the implant restoration.
Implementation Risks and Complication Mitigation
Abutment Loosening and Micro-Gap Contamination
Inadequate torque can lead to micromovement and screw loosening. This creates a micro-gap at the implant-abutment interface, allowing bacterial infiltration. Consequences include halitosis, soft tissue inflammation, and localized crestal bone loss. To mitigate this risk, clinicians must strictly adhere to manufacturer torque guidelines. Typically, this requires 10-15 Ncm for healing components using a calibrated torque wrench. Always verify the seat alignment radiographically before applying final torque. If a component repeatedly loosens, the clinician must investigate potential causes, such as occlusal interference from opposing dentition or incomplete seating due to hard or soft tissue impingement.
Soft Tissue Ischemia and Mucosal Recession
Selecting an oversized emergence profile can apply excessive lateral pressure on thin tissue biotypes. This restricts blood flow, causing soft tissue ischemia and eventual mucosal recession. To prevent this, clinicians must carefully assess the tissue biotype before choosing dimensions. Employ gradual tissue expansion techniques if a larger profile is needed. Start with a narrower collar and step up the size over several weeks to allow the tissue to adapt without losing blood supply. Blanching of the tissue upon placement is normal, but it should resolve within 10 to 15 minutes. If blanching persists, the component must be removed and modified to reduce the lateral pressure on the mucosal margins.
Bone Profiling and Seating Interferences
Crestal bone overgrowth or hard tissue remnants can prevent the component from seating fully and flush into the internal implant connection. Forcing the screw can strip the threads or damage the implant connection. Mitigation requires the use of bone profilers or guided drills prior to placement. These tools clear bone flares and ensure a passive, friction-free fit, guaranteeing the biological seal is established at the correct restorative platform level. Clinicians must visually inspect the implant platform after removing the cover screw to ensure no bone or soft tissue tags obstruct the internal connection before attempting to seat the transmucosal component.
Conclusion
The Healing Abutment remains the primary driver of peri-implant soft tissue architecture, successfully bridging the gap between surgical placement and final restoration. Proper selection and management directly influence the long-term health and aesthetics of the implant site.
Audit your current soft tissue management protocols to identify areas where custom emergence profiles could improve aesthetic outcomes.
Standardize your material selection based on patient biotype, reserving zirconia or custom PMMA for thin biotypes in the anterior zone.
Evaluate chairside customization systems or CAD/CAM workflows to reduce secondary tissue conditioning appointments.
Implement mandatory radiographic verification for all component seating to eliminate micro-gap contamination and prevent early bone loss.
FAQ
Q: What is the difference between a healing abutment, a healing cap, and a healing collar?
A: These terms are clinically interchangeable synonyms. They all refer to the temporary transmucosal component used to shape the surrounding gingiva and protect the implant connection during the healing phase prior to final restoration.
Q: What is the difference between a healing abutment and a cover screw?
A: A cover screw sits flush with the implant platform and is used when the implant is completely submerged under the gum tissue for a two-stage healing process. A healing abutment protrudes through the gums to shape the tissue and connect the oral environment to the implant.
Q: How long does a healing abutment stay in the mouth?
A: It typically remains in place for 2 to 6 months, depending on the patient's bone quality, the surgical protocol used, and the time required for complete osseointegration and soft tissue maturation.
Q: Does placing a healing abutment hurt?
A: Placement is performed under local anesthesia, so the procedure itself is painless. Patients may experience mild soreness or gingival tenderness for a few days post-operatively as the tissue adapts to the new component.
Q: Can a healing abutment fall out?
A: Yes, it can loosen and fall out if it was under-torqued, if the patient chews hard foods on it, or if it fails to seat fully due to bone interference. If it falls out, contact your dentist immediately to have it cleaned and replaced before the gums close over the implant.
Q: How do I clean around a healing abutment?
A: Maintain excellent oral hygiene by gently brushing around the metal or ceramic collar with a soft-bristled toothbrush. Your dentist may also recommend an antimicrobial mouth rinse, such as chlorhexidine, to prevent plaque buildup during the initial healing weeks.